What! Kmon now Doc,...it's still April! Yes of course it's only April. That's why we are getting started now! Actually there are a couple of practical reasons for starting now. One is my work schedule has gotten a lot busier so I will have to spread things out to be certain it gets done on time. The other is that this may be the last year of the Halls. It's not definite, but very possible. Very likely we will be relocating within the next year or so. My oldest is off to college. She was the original inspiration for this whole thing when she was back in the fifth grade! Anyway if this is in fact the case, we want this year to be the most spooktacular ever, so of course it will take more time.
Believe it or not Ghouls, I am still taking down the crypt from last year! We basically have not had a garage for about 3 years now. While I am doing this I promise to post the long overdue tutorial on the crush wall. I know a bunch of folks have been asking about that.
This year we will have a similar layout for the traffic flow. The theme is basically a haunted hotel. Guests will enter first a dark "back alley" with thunder and lightning overhead. They approach the back entrance of the hotel where they actually have to go up a few steps to the door! A ghost can be seen through the door window as they approach and she is walking down the steps inside. Just before she gets to the door, it opens into a room where there will be a bunch of scares, peppers ghost effect (one last time), etc. Then the guests will have to go down a few steps to the main hotel lobby where they are greeted by the zombie bell hop! He will guide them into the "tower of terror" elevator (based on the disney attraction) The elevator is basically the same concept from last year. We will have them spend a little more time in there and there will be much more actor participation. They will exit the elevator and enter the "dot maze". This is just a souped up version of the well-known "dot room" which is a room with fluorescent dots. A couple actors are dressed up in dot suits and totally blend in to the surroundings until they move forward! We did this a few years ago and it works very well! Highly recommended. Anyway this is a great transition to the vortex of course which they will finish up with.
So that's a quick overview! Much more ahead, and thanks again Ghouls for reading and following!
Halloween 7/24/365

Showing posts with label halloween garage haunt. Show all posts
Showing posts with label halloween garage haunt. Show all posts
Saturday, April 13, 2013


Tuesday, November 6, 2012
2013- Day 359- Final notes
There's no question we took it to another level this year! The amount of detailing was unprecedented. Of course we had the extra year to work with but everything seemed to flow very well despite the complexity of this year's build. The entrance door was huge as we noted earlier. The drop panel was a great scare and will be used again. Overall very little damage to the haunt. A couple of pictures were knocked off in the entrance hall. The elevator was a smash hit! I recommend the moving panel as it creates the most realistic sense of motion. The ghost worked better than I thought but we had the technical problem with the light on the back panel going out. It was perhaps a little too much to have people see the ghost as they were exiting the elevator before going into the crypt. The concept of changing sets for people going into and then out of the elevator through the same door was a little awkward but we did make it work, sort of. The crypt and crush wall were tremendous! The wall held up much better than I thought. Interestingly, many people did not even see the corpse because for some reason they were looking elsewhere!
And now some thoughts going forward for 2013:
1) The drop panel is a definite keeper. We will re-employ it somewhere else
2) The elevator will be rebuilt in a slightly different way
3) More will be done with video projection. The snake effect was very interesting, somewhat effective, but again the problem was that it had to be very brief because it was a floor projection where people were walking into it.
4) We're going for the peppers ghost 1 more time! We have to abandon the moving ghost because we just don't have the space for it.
5) The crush wall worked great, but I think we are going to rest the crypt theme for next year.
That's it Ghouls for 2012. Thank you all for reading and following. Stay tuned for the "Halls of Doom" 2013. The next build will be the most ambitious yet!
And now some thoughts going forward for 2013:
1) The drop panel is a definite keeper. We will re-employ it somewhere else
2) The elevator will be rebuilt in a slightly different way
3) More will be done with video projection. The snake effect was very interesting, somewhat effective, but again the problem was that it had to be very brief because it was a floor projection where people were walking into it.
4) We're going for the peppers ghost 1 more time! We have to abandon the moving ghost because we just don't have the space for it.
5) The crush wall worked great, but I think we are going to rest the crypt theme for next year.
That's it Ghouls for 2012. Thank you all for reading and following. Stay tuned for the "Halls of Doom" 2013. The next build will be the most ambitious yet!
Monday, November 5, 2012
2013- Day 360- More from the "Halls" 2012
Entry door details
 |
| Daytime view of the newly created haunt entry door |
 |
| The "Halls of Doom" are officially open! |
Putting it all together!
The aftermath: checking for any failures and damage after the show
Behind the scenes: the control room hours before the Halls open!
Thursday, November 1, 2012
2013-Day 364- An amazing show!
 |
| This is the plan of the haunt. Guests enter the mansion hallway, enter the elevator, go down to the crypt level, exit the elevator and see the ghost apparition, then enter the crypt and exit out through the end hallway where we had prop heads hanging and actors jumping out. Finally the vortex! Use this map as a reference for the video! |
Sunday, October 28, 2012
2012- Day 3- The Show Will Go On!
I think it looks OK for us. The brunt of the storm is looking like it will hit fairly well south. Basically just rain forecast for Wednesday. I had a couple of the actors over last night to review their scripts. One is stationed behind the drop panel, one is the 'Count' who will greet the guests in front of the elevator and will manage the sliding wall in front of the crypt door, and the third is the video operator who will work the snake projection image. Today I am having the elevator operator over. He has one of the more difficult jobs, namely pulling the elevator panel up and holding it there for several seconds until the guests leave the elevator. I did have to hire someone to do that! Once your haunt reaches the level where you need to start paying people to do jobs, maybe it's time to scale back? A bunch of weatherproofing steps also need to be taken today for the vortex ahead of whatever we get from the storm. Lots of testing over the next couple of days. I hope to have a bunch of pics and maybe some video.
Friday, October 26, 2012
2012- Day 5- 'Frankenstorm' or not
We are going to continue to move forward and prepare to run this build whether it happens on the 31st or not. Last year it was rescheduled for a week later but we were out of town. So I suppose if cooler heads prevail we can rationalize that it will happen but we're not sure when. I don't think there will be snow this time based on the latest forecasts. The question is the wind, how much, will power be out and for how long. You can't make this stuff up Ghouls, but we can't control it so we're moving on with the finish. Not much left to do. There is a foam entry door we need to set up, lot's of weather proofing between the garage and the vortex, one more sound byte for the ghost area, some last minute tune-ups for the vortex, mostly light-proofing and dot painting on the fabric. Finally we need to test everything over the next few days and go over the key actors and workers roles this weekend.
Thursday, October 25, 2012
2012- Day 6- Storm threatens the show for second straight year!!
 |
| Major storm approaches from lower right heading north |
Monday, October 22, 2012
2012- Day 9
 |
| Vortex with fabric installed |
 |
| Exit hall framed out |
.JPG) |
| Steps going into the vortex- finally! |
Sunday, October 21, 2012
2012-Day 10- Scenes from the upgraded Mansion

 |
| Entrance hall. Notice the 'real' webs! Skeleton and stacked books prop with chandelier a little further back. |
 |
| Chandelier view from the foyer |
Saturday, October 20, 2012
2012- Day 11- Air cannon reloaded
Monday, October 15, 2012
2012-Day 16- Rolling update
.JPG) |
| Vortex bridge reassembled! |
 |
| Chandelier nearly complete. One arm needs to be reattached. |
Friday, October 12, 2012
2012- Day 19 Hoops done!
.JPG) |
| Attaching arms to the base. You can drill an extra hole in the base to run the wires through. |
.JPG) |
| All 3 hoops reassembled! |
Wednesday, October 10, 2012
2012- Day 21- Chandelier update
 |
| Corpse arms complete with collars. We will have to add the chain links to the collars in the next few days for the final installation! |
Saturday, September 1, 2012
2012- Day 60
School's back in session. Halloween decorations are already out. It's beginning to look a lot like our favorite season again Ghouls! Lots to do this month. We will start on the chandelier this weekend. Pepper's ghost effect will be finally tested, sound installed and the front entrance hall will be renovated. Probably we'll get the web gun out, re-install the air cannon and set up the work zone for the ghouls who will be behind the scenes as it were. What I am hoping is by October, the only things left will be the vortex, exit hall and entrance door. This will give us plenty of time for testing which this set really will need. There are just too many things happening to have it run smoothly without many run throughs!
Thursday, August 23, 2012
2012 Day 69- Elevator light and X10 revisited
The sequence for the haunted elevator goes like this:
1) Elevator door ghoul (actor) waves his hand toward the doors to open them. I can see this gesture from the control room monitor and at that moment I can open the doors using the pulley bar. Of course there is a sound bite!
2) As the guests enter the elevator, the overhead light turns on. This is a red LED which I can operate using an X10 remote (see video)
3) Once the guests are inside, the 'door ghoul' does have to manually close them. The overhead light turns off so it is pitch dark, a weight drops onto the elevator making a loud clunk with enough force to shake the elevator a bit, and then there is a sound bite scream.
4) Right after the scream, the back panel light turns on showing the moving panel only and along with the light there is a creepy laugh as the panel moves simulating the elevator going down to the crypt level.
5) Once the crypt level is reached, the overhead light turns back on and the doors reopen!
The following video demonstrates operation of the X10 remote to turn on and off the elevator light. For a detailed explanation of X10 and how it works, you can see this post
1) Elevator door ghoul (actor) waves his hand toward the doors to open them. I can see this gesture from the control room monitor and at that moment I can open the doors using the pulley bar. Of course there is a sound bite!
2) As the guests enter the elevator, the overhead light turns on. This is a red LED which I can operate using an X10 remote (see video)
3) Once the guests are inside, the 'door ghoul' does have to manually close them. The overhead light turns off so it is pitch dark, a weight drops onto the elevator making a loud clunk with enough force to shake the elevator a bit, and then there is a sound bite scream.
4) Right after the scream, the back panel light turns on showing the moving panel only and along with the light there is a creepy laugh as the panel moves simulating the elevator going down to the crypt level.
5) Once the crypt level is reached, the overhead light turns back on and the doors reopen!
The following video demonstrates operation of the X10 remote to turn on and off the elevator light. For a detailed explanation of X10 and how it works, you can see this post
Tuesday, August 21, 2012
2012- Day 71- More crypt work and video projection test
We tested the crush wall. No problems there. The rolling mechanism is actually smoother now that it has aged a year! The snake video projection was also turned on and that works fine as well. The concept behind video projection can be reviewed in this post from last year.
We will have things set up so that when the crypt door opens, the snake video will be on and as soon as the guests enter the crypt it will get shut off. An important point on these projectors is you can't stop or even pause them without having those annoying display signs appear in the projection e.g "pause", "stop" etc. thus killing the effect! I had to rig a shutter device which is shown in the second video. This can be operated manually by the "videographer". It will take some practice to get the flow down. First the shutter is deployed, then the video is paused until the next group is about to enter. Then before the crypt door opens, the video is unpaused and the shutter opens. Next the crypt door opens. I think I am going to have to write this one up for whoever is doing it! We'll call it the 'home haunting playbook'!
The following are a couple of videos illustrating the live effect:
We will have things set up so that when the crypt door opens, the snake video will be on and as soon as the guests enter the crypt it will get shut off. An important point on these projectors is you can't stop or even pause them without having those annoying display signs appear in the projection e.g "pause", "stop" etc. thus killing the effect! I had to rig a shutter device which is shown in the second video. This can be operated manually by the "videographer". It will take some practice to get the flow down. First the shutter is deployed, then the video is paused until the next group is about to enter. Then before the crypt door opens, the video is unpaused and the shutter opens. Next the crypt door opens. I think I am going to have to write this one up for whoever is doing it! We'll call it the 'home haunting playbook'!
The following are a couple of videos illustrating the live effect:
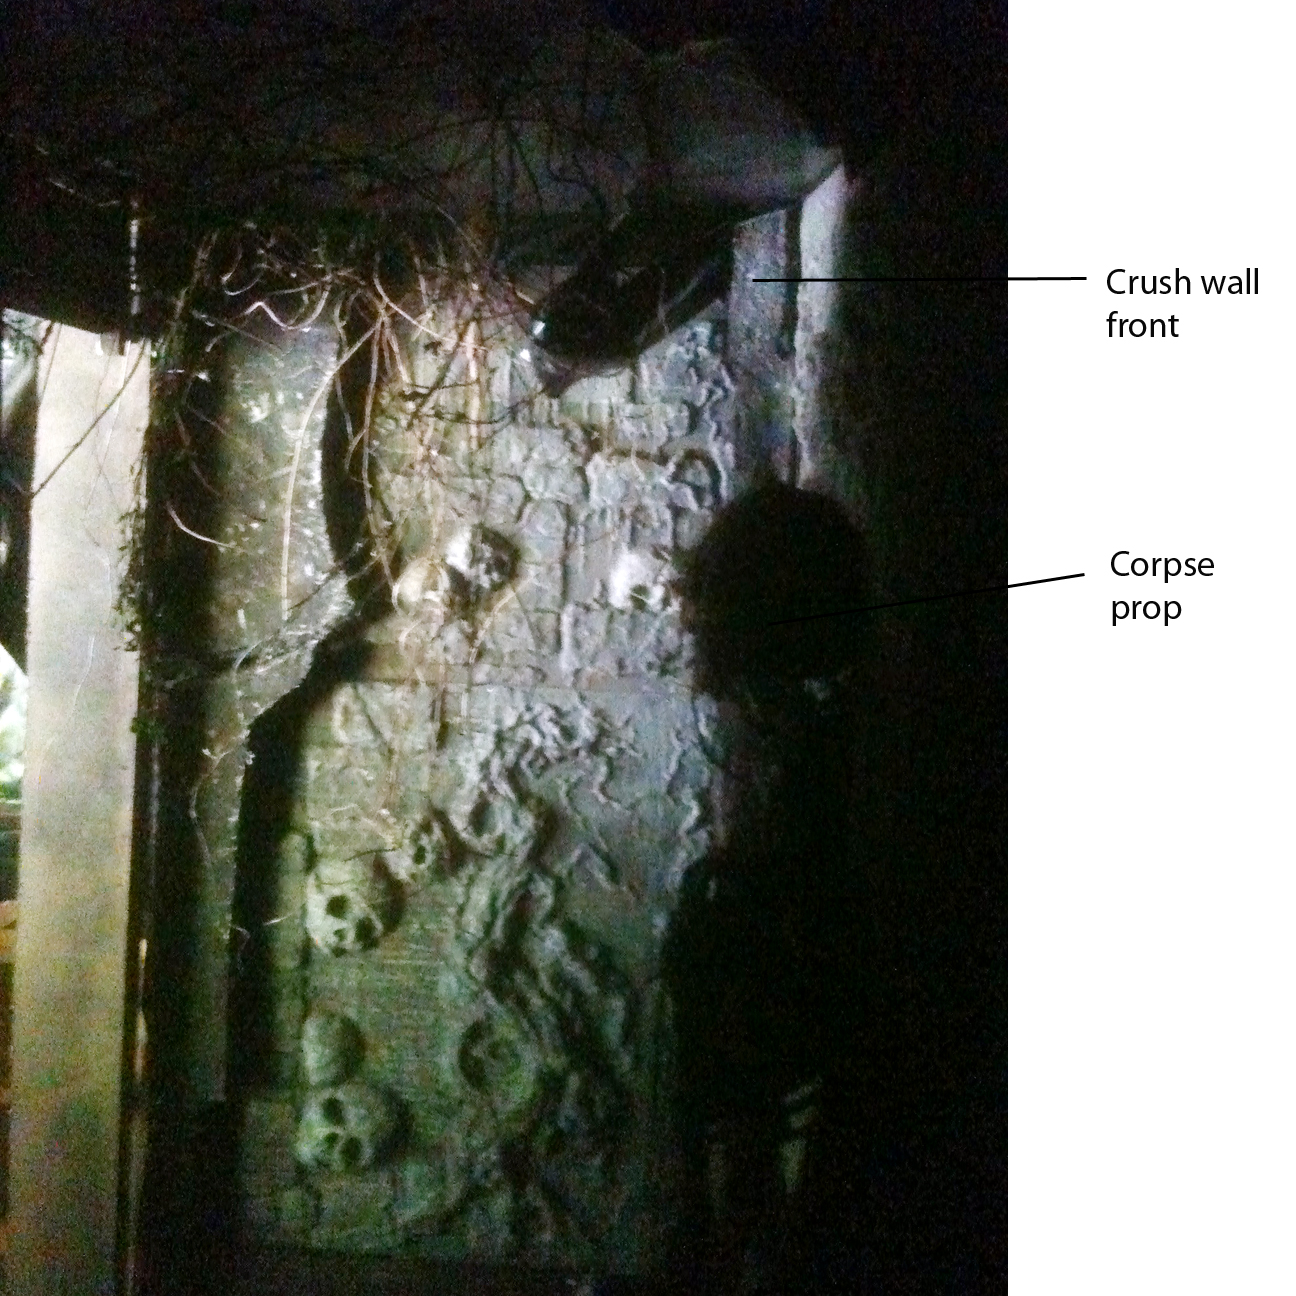 |
| This shows the crush wall basically fully deployed to a position about half -way to the exit door from the back of the room. More than enough to scare even the bravest of souls! Remember the corpse prop will have live night crawlers on it! |
Tuesday, July 31, 2012
2012 Day 92- Control room chaos!
Time now to make order out of chaos! I walked into the control room and confronted a literal bird's nest of cables, cords and switches. What! Where does all this stuff go and what does it control!!? The switches are nothing high tech. The extension cords plug into the switches which then plug into the strip. I do have an X10 remote which is used to turn on the crypt crush wall sound and light effects and I believe the elevator light and exit sound . First thing to do was turn on everything and make sure it all still works. And yes, so far so good! I tested all 3 cameras and no problem there. At least 4 sound boards are still functioning fine. Lighting for the foyer and crypt were also checked. A dvd sound system is set up for the crypt and this just replays 2 sound bytes over and over. We also have 4 pulley bars and 2 additional pulley ropes to reposition the crush wall after it is deployed! Two that are shown here open and close the crypt door, one operates the crush wall and one not shown opens the elevator doors. Got all that Ghouls! Now I need to make a map of everything especially the switches etc to remember what operates what!
 |
| The basic control room breakdown. This is where all the action is! |
 |
| DVD player sites on top of the monitor for Camera 3 - the Crypt. You can see the front of the crush wall recorded live! |
 |
| Camera 2 monitors the inside of the elevator. You can see the X10 remote (small white box) sitting in front of the monitor. |
 |
| This is the Foyer and also entrance into the Crypt as shown by Camera 2 |
Sunday, July 29, 2012
2012 Day 94- Corpse chandelier
Our 'big' prop project this year will be the corpse chandelier. I have a chandelier prop that we have used in the past which does have a shake motor built into it, but it hasn't gotten a lot of attention. You can see that prop here in the top image. It's kind of cool, but I thought we needed something with a little more creep to it. I found the solution a couple of years ago searching through the 'Monster page of Halloween project links'. Those of you who are not familiar with this resource really need to investigate it! Don't feel you have to come up with everything on your own and reinvent the wheel! Here at the 'Halls of Doom' most of the sets, props and effects are tweeks of previously developed projects, many of which are found on the Monster page. One of these, the corpse chandelier, is perfect for the upgrade of the Mansion hallway we are looking for! I probably will not build the candles from scratch though.
Monday, July 9, 2012
2012- Day 114
The following is a brief tour of the Halls of Doom, again largely left intact due to last year's freak storm. This was unexpectedly creepy going in there to see what we left behind as we begin the journey to Halloween 2012. I may not need any fake spider webs at all! It was very dark in there as you can see.
Wednesday, June 27, 2012
2012- Day 126
We will get started very soon with the haunt restoration as I'm going to call it. Here is a rough breakdown of the schedule:
1) July- system check. We will go through each area and test all the lighting , sound etc, make sure it still works after sitting there for 9 months! We will also start on the corpse chandelier project. This will replace the one that's there now in the entrance hall.
2) August- 3 areas we want to address are the entrance mansion hallway, the crypt and the pepper's ghost area. I have some extra foam and now with the additional time there is no excuse for not making the entrance hallway REAL! The pepper's ghost was never actually tested so we will need to do that. This will give us time to make any changes. We will need to add some sound effects to that event as well. Finally the crypt had some "holes" in the back wall that were never really patched up.
3) September- time to do work on the exit hallway with possibly a ramp leading up to the vortex, and the workers space as well as setting up and testing the cannon again.
4) October! This will be the time to rebuild our friend the Vortex, and this year I am hoping to really make the access to it seamless and completely enclosed! We are also going to create an appropriately detailed entrance doorway to the haunt.
So that's a rough breakdown of the "plaaaaaaaaaaans!"
Stay tuned
1) July- system check. We will go through each area and test all the lighting , sound etc, make sure it still works after sitting there for 9 months! We will also start on the corpse chandelier project. This will replace the one that's there now in the entrance hall.
2) August- 3 areas we want to address are the entrance mansion hallway, the crypt and the pepper's ghost area. I have some extra foam and now with the additional time there is no excuse for not making the entrance hallway REAL! The pepper's ghost was never actually tested so we will need to do that. This will give us time to make any changes. We will need to add some sound effects to that event as well. Finally the crypt had some "holes" in the back wall that were never really patched up.
3) September- time to do work on the exit hallway with possibly a ramp leading up to the vortex, and the workers space as well as setting up and testing the cannon again.
4) October! This will be the time to rebuild our friend the Vortex, and this year I am hoping to really make the access to it seamless and completely enclosed! We are also going to create an appropriately detailed entrance doorway to the haunt.
So that's a rough breakdown of the "plaaaaaaaaaaans!"
Stay tuned
Subscribe to:
Posts (Atom)