Halloween 7/24/365

Thursday, August 23, 2012

2012 Day 69- Elevator light and X10 revisited

The sequence for the haunted elevator goes like this:
1) Elevator door ghoul (actor) waves his hand toward the doors to open them. I can see this gesture from the control room monitor and at that moment I can open the doors using the pulley bar. Of course there is a sound bite!
2) As the guests enter the elevator, the overhead light turns on. This is a red LED which I can operate using an X10 remote (see video)
3) Once the guests are inside, the 'door ghoul' does have to manually close them. The overhead light turns off so it is pitch dark, a weight drops onto the elevator making a loud clunk with enough force to shake the elevator a bit, and then there is a sound bite scream.
4) Right after the scream, the back panel light turns on showing the moving panel only and along with the light there is a creepy laugh as the panel moves simulating the elevator going down to the crypt level.
5) Once the crypt level is reached, the overhead light turns back on and the doors reopen!

The following video demonstrates operation of the X10 remote to turn on and off the elevator light. For a detailed explanation of X10 and how it works, you can see this post

Tuesday, August 21, 2012

2012- Day 71- More crypt work and video projection test

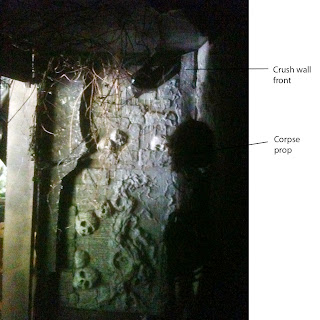
We tested the crush wall. No problems there. The rolling mechanism is actually smoother now that it has aged a year! The snake video projection was also turned on and that works fine as well. The concept behind video projection can be reviewed in this post from last year.
We will have things set up so that when the crypt door opens, the snake video will be on and as soon as the guests enter the crypt it will get shut off. An important point on these projectors is you can't stop or even pause them without having those annoying display signs appear in the projection e.g "pause", "stop" etc. thus killing the effect! I had to rig a shutter device which is shown in the second video. This can be operated manually by the "videographer". It will take some practice to get the flow down. First the shutter is deployed, then the video is paused until the next group is about to enter. Then before the crypt door opens, the video is unpaused and the shutter opens. Next the crypt door opens. I think I am going to have to write this one up for whoever is doing it! We'll call it the 'home haunting playbook'!
The following are a couple of videos illustrating the live effect:


This shows the crush wall basically fully deployed to a position about  half -way to the exit door from the  back of the room. More than enough to scare even the bravest of souls! Remember the corpse prop will have live night crawlers on it! 

Sunday, August 12, 2012

2012-Day 80- Crypt before and after

We finished the crypt upgrades which were basically a ceiling repaint with gray and then gray speckled paint, followed by placement of vines onto, and hanging from, the ceiling. I was able to screw a couple of large roots into the ceiling frame and then secure the lighter stuff with twine. I think it came out pretty well. We will place webbing from the gun in there as well. Looks like we will need that foyer actor to also make sure people go in there, because I don't think they will want to now! It looks a lot more dense than it is. There is still plenty of room for at least 6 guests. I had to be sure not to obstruct the ceiling in the path of the moving wall.
Crypt ceiling before additions
Crypt after repainting and adding 'details'


Saturday, August 11, 2012

2012- Day 81 -Flicker candles

We're busy making the crypt upgrades. I did manage to pull some vines and some creepy looking twigs etc from the yard. I also did one coat of gray on the crypt ceiling. We'll see if that takes out the shine.
I have everything for the chandelier except the mask latex. Looks like I'll have to go online for that, but we will have to make the thing first. It looks very involved. I don't know how these guys can say this takes only a couple of hours! One of the keys, Ghouls, is obviously the candles. We are all looking for the ultimate candle that looks real but isn't! Now I know there are some Wizards out there that can do these from scratch. I am not a Wizard. I'm more of a mad scientist. I am going to concede the candle making and instead I found these things called Rosco candles , "indistinguishable from real flame". OK well let's not get carried away, but so far, and I have been looking for a couple of years now, they are the best I have seen. They come wired and you just connect to a 9 volt power source. Here is kind of what it looks like:

Saturday, August 4, 2012

2012 Day 88- Crypt upgrade plans

I did happen to be at Disneyland earlier this summer and believe me I am taking mental notes every time I have the opportunity to go out there! All of the props and sets are carefully analyzed. I don't mind the lines for that reason. It gives me plenty of time to think about possibilities! This year it was the Indiana Jones ride that showed me the way to making the crypt more tomb-like! Of course Ghouls, the hanging vines! They're everywhere! So while the vacuform panels and the fake stone as well as the corpse are all great, we can definitely ramp things up. The ceiling needs some work. I mistakenly put the shiny gray side of the foam boards facing down so when painted black they were still shiny and we didn't have enough time to do anything about it. Well now we do! We need to repaint the ceiling a neutral earth tone and what I plan to do is go outside in the back of the property and gather up a bunch of twine, which we do have incidentally, then hang that in various areas around the crypt and from the ceiling and paint those as well. That will make a huge difference as well as the webbing created from the gun! I think it will be amazing when it's done!
Current state of the crypt ceiling. Foam boards painted black but way too shiny. Needs some work!